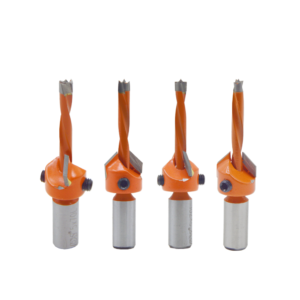
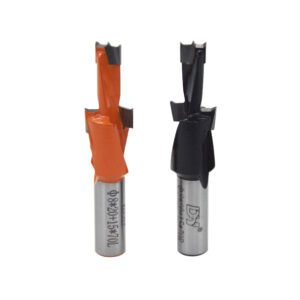
Using a countersink drill bit effectively prevents tearing, reduces the possibility of wood splitting, and allows screws to make better contact with the wood. In addition, it makes DIY projects look more professional.
Countersink bits have two purposes: First, they drill a pilot hole in the workpiece. A pilot hole is a small hole in the workpiece that leaves room for a fastener such as a screw. The purpose of drilling a pilot hole is to prevent the wood from splitting or cracking.
Second, the countersink bit forms a “V” shape or countersunk hole in the surface of the workpiece. This “V” shape or recessed area allows screws with countersunk heads to be placed flush with the surface of the workpiece. Make woodworking more pleasing to the eye.
So what are the types of countersink drill bits?
·Flute Drill Bits
Using a fluted drill bit requires four steps and two bits;
1-Mark the location
Use a pencil to mark the location of the hole, and then use an awl to create a starting point for the drill bit to prevent the drill bit from wandering on the surface of the wood.
2-Drill a pilot hole
Choose a fluted drill bit that corresponds to the size of the screw to drill a pilot hole.
Use tape to mark the depth of the pilot hole. The depth of the pilot hole does not need to be drilled to the exact length of the screw. It only needs to be close to the length of the screw.
Clamp the drill bit in the drill and drill until the tape touches the surface of the workpiece.
3- Countersinking
Select a recess drill bit that corresponds to the size of the screw head and clamp the drill bit in the drill.
Then, drill a hole deep enough to make the screw head flush with the surface of the wood. Or drill a hole deep enough to hide the screw head with filler or wood plugs.
4- Screw in the screw
Use a screwdriver or drill to drive the screw into the countersink.
· Combination Drill Bit
A combination countersink drill bit can drill a pilot hole and a countersink at the same time (it is a drill bit inside a recess drill bit), and only requires three steps and one drill bit.
The first and last steps are the same as for the recess drill bit. The steps in between are as follows:
Select a combination drill bit that corresponds to the size of the screw and adjust the bit to match the length of the screw.
Then, tighten the screw with a hex wrench and clamp the bit in the drill. Drill a hole deep enough so that the screw head is flush with the surface of the wood. Or drill a hole deep enough to hide the screw head with filler or wood plugs.
When does a woodworker need a countersink bit?
· Prevent tearout
The “V” shape created by the countersink bit allows the screw to sit flush with the surface of the wood.
Driving a screw flat without a countersink bit crushes the wood fibers. Crushing wood fibers can cause tearouts in the surface of the wood, which can make our project look unprofessional.
Another consideration is the hardness of the wood. We may be able to drive a screw flat without a countersink bit on softwoods (remember that this can cause tearout). But on hardwoods like oak, driving a screw flat without a countersink bit can be difficult.
· Reduce splitting
Driving a screw creates an outward force on the wood. This outward force can cause the wood to split.
Drilling a pilot hole creates a space for the screw. This space reduces the outward force. The screw can pass through the hole more easily, reducing the possibility of the wood splitting.
·Achieve better contact
The countersink bit creates an area in the wood that matches the shape of the screw head countersunk. This shape allows the screw to contact the wood with equal force. This creates a strong bond between the screw and the wood.
·Hide the screw
The countersink bit allows the screw to be flush with the surrounding wood, but there are also several ways to hide the screw head.
The countersink bit can drill deeper into the wood so that the screw is below the surface of the wood. The screw head can then be covered with filler. Or the drill bit can be drilled deeper to create an area for a plug. The wood plug can then be inserted into the hole to hide the screw and make the project look more complete.
If you have the above processing needs in your woodworking project, then there is a good chance that you need a countersink drill bit. I hope the above article will help you with your woodworking work. If you have more about countersink drill bits to share with everyone, please leave a comment!


